Visualizzazione post con etichetta Fallrainbow. Mostra tutti i post

sabato 16 febbraio 2008

Surprise!


This is a great surprise for me! Michelle from Oregon knitted her Fallrainbow and I asked her to send me some pictures to show it.
She looks so pleased to wear it, and I am so proud she followed my pattern. I know other people are working on this pattern but this ist the very first FO.
Congratulations Michelle, you made my day!

Che sorpresa! Michelle, in Oregon, ha realizzato il suo Fallrainbow ed io le ho chiesto di mandarmi delle foto da mostrare.
Sembra proprio contenta di indossarlo ed io sono orgogliosa che abbia realizzato un mio modello. So che altre magliste lo stanno eseguendo, ma questo è il primo ad essere terminato!
Bravissima Michelle, mi hai fatto felice!

lunedì 3 dicembre 2007

Notes to Fall Rainbow pattern


Vorrei aggiungere qualche informazione alle spiegazioni del cappotto Fall Rainbow. Lo faccio solo nel "mio inglese” sperando di scrivere prima o poi tutto in italiano!

I wish to add a few notes to Fall Rainbow pattern:
  • When you're knitting the body striped sequence, remember the best place to change color is first st past front garter edging. Just knit this stitch with both colors held together. Drop the old color and continue knitting in the new color. When you come across the double stitch on WS row, purl it with the new color. Then, pull on the end of the old color until it gets hidden.
  • If you choose to sew this sort of braces, remember "do not" fix the back central point, in wich all the bands meet, to the knitted fabric. This point is too stiff and it would show on the right side of garment. You should simply fix the shoulder bands onto the underarm band but leave it separate from the knit.

  • To alter size remember these points:
    - Fall rainbow is a top-down jacket, for little alterations of size you can cast on the specified number of stitches and follow pattern instructions to make raglan increases and to shape lapel. Place stitches on a scrap yarn and try the yoke on, if you haven’t reached your raglan measurement yet place stitches on circulr needle again and continue with raglan increases until your desired measurement is reached.

    - Now you have to set up the chevron pattern according to your actual number of stitches.You will work six "peaks": one in each front section, one in each sleeve section, and two in the back section. Place a marker at each peak vertex, and write down how many stitches you have at the base of each peak . (the peak in the sleeve will take only the central portion of the section).

    - You have to adjust peak shaping. I suggest you to make a test swatch and write down your changes onto a piece of paper, so you won’t get lost! Download this schematic to understand how the peak is shaped by using both short rows and increases. You’ll have a different number of stitches at the base of the peak, so you can either :
    a) change the number of stitches to work before each turn, working the same number of rows indicated in the pattern (your peak will be less pointed!)
    b) keep turning your work every three sts from previously w&t stitch (you’ll have more rows to knit to complete the peak, and your peak will be more pointed!)
    c) try to stir a middle course both increasing the number of stitches to work before each turn and the total number of rows to compleate the peak.

    - Your personal chevron "peak" is now established using short rows and increases, then it has to be continued using increases and decreases. Remember that the number of stitches each peak is made of, has been increased by 2 sts every odd row, according to your personal chevron pattern! All you have to do from now on is keep on following its shape according to pattern in a very simple way:
    RS Row : k1 (this stitch is your decrease line), SSK, knit “n” sts, m1, sl marker, k1 (this stitch is your increase line), m1, knit “n” sts, k2tog, k1 (this stitch is your decrease line).
    WS Row : purl.

sabato 1 dicembre 2007

Una forma confacente


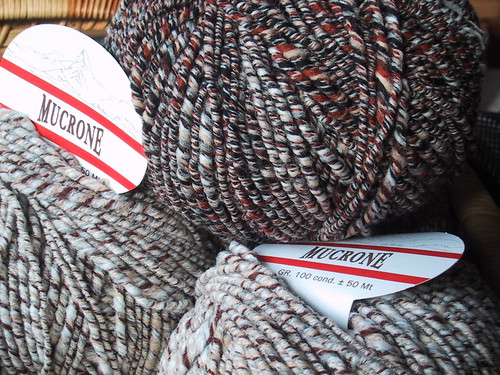
I gomitoli morbidi e colorati nella barra del titolo sono stati usati da tempo, indossati, e abbondantemente fotografati durante la metamorfosi che ora finalmente li mostra così! Mi ci sono dedicata per parecchio tempo, credo due mesi ... ho fatto qualche campione e parecchi tentativi, ho sfilato e ricominciato ... e nostante tutto mi sono divertita! Sarà che fresca della lettura dei libri della Zimmermann, mi sentivo recettiva alle ispirazioni, ho anche scritto per bene le istruzioni e le ho inviate a Kerrie, l'editrice di Magknits. Nel giro di poche ore ho avuto un riscontro positivo! Poi è passato qualche mese per trovare lo spazio nella rivista, ed ora eccovi cotanto cappotto! La cosa che mi piace davvero è essere riuscita ad usare al meglio un sacco di gomitoli diversi, avanzi di vari colori, acquistati in blocco nell'outlet della Manifattura Sesia. La verità è che certe lane mi ispirano subito .... certe altre (il fatidico Mucrone!) sono davvero difficili e non riesco a trovare una forma che "lor si confaccia".

PS: nel caso ve lo chiediate ... no, non si tratta del balcone di casa mia! E’ invece la residenza di campagna del benemerito conte di Rignon, ora adibita a biblioteca civica e parco pubblico. La città di Torino e la sottoscritta ringraziano!

A proper shape
Those soft and colored balls up in the title bar, have been used up since a long time. I have taken a lot of pictures while they were undergoing a complete transformation to show themselves as they are now!
I devoted myself to this task for about two months … I made swatches, tests, I ripped them and I started again… and nonetheless I did have fun! Maybe it was because at the time I had recently read E.Zimmermann’s books, and I felt open to inspirations.
I wrote down the pattern and I sent it to Kerrie, the editor of
Magknits.
I had a positive feedback within a few hours! Then I had to wait some  months before she could find a place for it in the magazine, but now such coat is here!
Most of all I like the fact I managed to use up at my best a bunch of odd balls of various colors I bought in bulk from Manifattura Sesia outlet.
Truth is I feel highly inspired by some yarns … some others
(Mucrone, the fateful!) are very tough, and I can’t find a “proper shape” to knit them in.

PS: just in case you wonder about it...no, it’s not my home-balcony! It is the country residence once owned by the well-deserving earl of Rignon, and now used as civic library and public park. The city of Turin and the undersigner give thanks!


Fallrainbow step by step


LinkWithin

Related Posts with Thumbnails